Followers

10/31/2015

Christmas Card Club - Christmas Bird

Hi There. It's time again for our Christmas Card Club - and since last time I forgot about the challenge until late Sunday evening--AND since this week it was MY turn to select the theme for our challenge, (Cardinals or any Christmas bird), I knew I had to be on time for this one! :-} LOL...I'm going to get this post done early! Before we get started, though:
        HAPPY HALLOWEEN to all my friends who observe the holiday.
 
 
Now on to the Christmas Card Club Cardinal (you knew I'd pick the cardinal for the bird on MY card, din'cha?!)


- Northwoods image (PP9864) - colored with Copics, WoS on Mr. C, some Pentel Slicca gold pen to highlight the pine needles, and a bit of SnS Twinkling Clouds Sparkle & Soft on the branches for snow (DH's idea to add that. Come to think of it, believe he found this stamp at the Stampaway show. The guy has this idea from who knows where, that I possibly like cardinals). Before starting to color the image, the sky was inked with BG0000, but doesn't show well in the photo. The snowflakes and falling snow were inked with a white gel pen, then over-colored with a Sakura Silver Star pen, so pretty gleamings.  Added some crystal Doodlebug Silvery Sprinkles around for a little more sparkle.
 
Die cut the shape with S/B Labels 15 (#7 Die). Had a white edge around the frame, embossed with the rubber mat & die- with tape to hold in place. Image slipped during embossing and creased in places not meant to be embossed. Happily a Teflon bone folder aided in smoothing out most of the 'wrong crease marks', and the worst of the boo-boo hand trimmed away. Gold edging done with a fine-line Slicca gold pen, and a finger dauber with Tsukineko Northern Pines (a dark green) darkened any white at the edges.
 
Dark green snippet from another project on the front; [the final result was not the original plan. Had done some more smooshing & playing with acrylic silks in reds & golds; used a holly stencil and pan pastels to create a background...trimmed into 3 rectangles. Colors just did not look right with Mr. C]. Back to the drawing board. the doily half was in the debris stack (a Cheery Lynn die cut from newsprint dp). Inked the edge with Delicata gold, tucked under Mr C - ok...that looked better. Hunted thru some paper packs - found this blue dp that looked better with the sky background--- MS twig punch...that will have to do.
 
A Die-Versions sentiment die, from red glitter paper snippet and I'm done! You'll see the path not taken - on another project. (I hope). Disappointment is when what you envisioned at the start, just didn't look great at the end! However fun was had by all, and I hope you like the card.
 
Do check out what my fellow Christmas Card Club team shared on the Christmas Bird challenge. Their links are on the right side bar! Have a wonderful Sunday. Big Hugs and thanks for visiting.


10/29/2015

Halloween by Northwoods

Good evening. Welcome. As promised, back with my 2nd Halloween card. This one is for DH - so excuse the skull motif. He likes that look, I don't! (shudder). So let's get 'er going:


- Northwoods wreath image (from Stampaway show - yippee). Stamped with Tuxedo Black on copic Xpress paper, colored with copics and WoS, a Sakura silver star gel pen on the spider webs. Fun & fast to color. Die Cut with an MFT Stitched circle that fit the wreath size & DI Weathered wood smudged along the edges of the die cut with a finger dauber.

- orange background created with Silk acrylics - orange and yellow shades, puddled on a craft sheet, and spritzed with water. This paper was Canson Mixed Media paper - think it's 98#...fairly lightweight. Smooshed c/s through the puddles, and got 3 backgrounds with one play. [Used 140# W/color on one that is pleasing, but too heavy for this card]. While the piece was still wet, spritzed with a gold Tattered Angels spray; dropped in some orange Brusho crystals with a very light 'fifft' Sepia Color burst (which is more powdery and harder for me to control placement.) Used a very light touch with the Sepia, but still got a big blob in a hidden spot. The Sepia has some pretty shading to it, but am finding the crystals give more exact placement for me. Used an old C/B EF to emboss once it dried over night.

- black paper chosen for the skull motif - from 6x6 Recollections Halloween Basics, purchased recently.

- Spiderweb border from a snippet of black glitter paper (lightweight) punched with a Martha Stewart punch.

- Sizzix Halloween thinlets dies to cut the spooky & Halloween sentiments..both from snippets. Bats & witches punched from small Bazzill snippet using an MS punch. Debating on whether to add some black WoS for a little pizzazz.

There's a big party going on over at the Snippets Playground to celebrate Week 200! YAY! I am a latecomer to the show, but I hear there's been ROWDY doin's and I wanted to be certain I didn't miss out on too much. There's already some superlative entries into the challenge, and Wow on the highlights too. Awesome. I hope I have enough snippets on this one, that Parsnip will let me slip through the gate. If you hurry, there's still a bit of time left with Mr. Linky and Miss has a good prize this week. Check it out!!!

Also do check out the Cards by Friends tab at the top of _this_ blog, as another wonderful card has been added - which is going on the mantel with the others we've been blessed to receive.

As always thanks for popping in to visit. A friend reminded me today - always choose to be Happy, no matter what the day brings. I know that, but every now & again, it's good to get reminded.
Big Hugs & come again when you can.

10/28/2015

Halloween

Hello and Welcome! Before sharing today's card - finally got a Halloween card made {sigh}, let me give big shout-out to a new follower: Henriette van Mierlo. I'm trying to find a link so as to share Henriette's blog, but alas, I've not been successful. So Henriette, if you pop back for a visit, could you please share your link, and I'll post it so that my blog friends can perhaps become YOUR blog friends too!

Here's the card, and it's for the DD:


- Northwoods stamp purchased at the August Stampaway show - wood block. I LOVE their stamps, always have. The fact that the company was a vendor at this show was one of our reasons for making the drive to Cincinnati. Some others were to meet up with blog buddy Brenda W., having never been to this particular show, and also the fact that DH was originally from this area of Ohio....long ago.
Colored the image with fine line markers, except for copics on the ghost; WoS over the witchy sox,
then added some glossy accents.  The spider has a little dab of G.Accents, as does the cat's head. Used a Sizzix rectangle die to cut, then sponged with DI Spiced Marmalade and Wild Honey.

- MFT stitched curved die cut the background papers...the orange is from an old 12x12 Halloween pack (probably DCWV) and the stripe is from a 6x6 - newer purchase...of a Halloween pack.

- spooky sentiments from Sizzix Halloween thinlets by Tim Holtz - there are 2 different sets for Halloween. Provided an Amazon link to show the die set, but think mine came from local Hobby Lobby, using a coupon. These were cut from a snippet of black glitter paper.

Hope the Daughter likes it....we included a 'lunch on us' check, so we hope she'll enjoy.

Thanks for visiting, and I hope to get round to all my visitors today. Still got one more Halloween card to make for DH - it's his favorite holiday, so can't forget the guy who chauffers me around, now can I?

Big hugs, and Blessings too. Come again when you can.

=

10/27/2015

Rudolph Day - Christmas Trees

Good evening and thanks for swinging by to visit this evening. It's been a gloomy rainy day here in our part of the Upstate for the 2nd day, and the temperature is much cooler as well. I kept busy finishing up my card for October's Rudolph Day. In case you don't know about this challenge, it opens the 25th of each month until the month ends. Our sweet Maureen of Scraps of Life by Scrappymoi is our hostess, and the challenge is very easy: A project with a Christmas Theme. And here's the link to October's Rudolph Day Challenge (or as I call it - Rudy Day). So heave ho, let's go!


- an Impression Obsession Cling stamp (and I can't find a link on the website..I bought this one on sale at a show). Colored this one while we were in Florida, using the Staedtler fine line markers purchased at Target some time ago. The pens are lovely for getting into tiny spaces, but they have a tendency (at least in my hands) to 'dig at the paper'. Used WoStella over the pen coloring, and then applied a coat of glossy accent over each tree. I liked that effect - looks very glistening.

- Die cut with a long S/B scallop rectangle, and created a faux mat by tracing the outer edge of the same die, making it a bit larger. Hand cut that...I was trying to ground the trees with a bit of green underneath them. Also wanted some separation from the white embossed background...which was done with 2 different embossing patterns.

- sentiment is from HLS Mixed Christmas Sentiments, using a Red Versafine ink, punched out with SU punch, edged with the same red ink. Red glitter sticker spots to trim, and Voila, it's done!

So how about joining in with October's Rudolph Day challenge, and perhaps you might be the lucky winner of a pretty Memory Box Small Blooming Poinsettia die.

I'm very behind with returning all the lovely visits from the 2 earlier DeeDee's card posts, but I'll try to catch up tomorrow. In the meantime, here's a few pics of the trees we see from the front porch. These were snapped after our drizzle moved in, so the colors are not as great as that of Sunday, when we still had some warm sunshine and wonderful blue skies. Hope you enjoy.


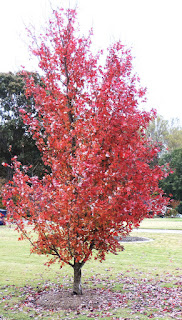
Little maple in our side yard
 
 
a Neighbor's tree

Tree in the yard of another neighbor next door
Thanks so much for your visit this evening, and hoping that your day went well. Big hugs and God Bless. 

10/26/2015

DeeDee's Digis - Rustic Leaves

Good afternoon, and Happy Monday. Back again with another card using DeeDee's Digis - the Rustic Leaves set. This one proved to be so very easy to use with a created background and a Memory Box border die.

Before sharing the card, let me first extend a warm welcome to a lovely new follower:

Caz S (Bunny) of Bunnys Bits n Bobs
 
Thanks so much for  becoming a follower here, and I hope you'll enjoy what you see! Also encourage my readers to pop over to say a big hello to Bunny, and check out her blog. Always so nice to meet a new friend.
 
Now on to the card:


printed the precolored leaves and used a S/B square die that fit the motifs to cut out. Used a dark blue Copic marker to go round the edges, as there was not room on the card front to add a skinny mat behind these squares.

- Memory Box Contempo Circle border (sorry, can't find this one to provide a link) - die cut from some Reflections Blue C/s. This die cuts off the edges, and there's a scalloped edge waste - which I decided to fit back over the 'holes' to create a defined border above the leaf squares after I saw that it looked better this way.

- background created using Tsukineko All Purpose Champayne Mist and some wadded cling wrap - daubed around on the card stock, leaving lots of clear spaces. Then put out some small dabs of Silk acrylic paint in a dark fall green and some orange. Spritzed all the paint with water to make puddles, then swiped some 140# w/b paper through the puddles, repeating until all the puddles were used (with just a few blobs, 4 backgrounds were created...as the ink is used, more water sprayed and of course the backgrounds get lighter). It's really quite a pretty look. This background was embossed with a leaf motif folder (Paper Studio A2 Leaves).

- Lawn Fawn Stitched Leaves - smaller leaves) were cut from a snippet of another created background which had been done earlier. Sentiment is from the Falling Leaves digi set and printed on the computer, die cut with a S/B label and sponged lightly with Shabby Shutters DI. Once I decided what I wanted to do with these pretty fall leaves, this card came together very easily.

Don't forget to check out the fall & winter digis that you can find over at DeeDee's Digis, as well as some pretty Christmas sets.

Thanks for joining me today, and I hope your week is off to a good start. This will be another busy one for us, but at least the weekend gave us a little breather. Hope the weather is nice where you are. Come again when you have time! Big hugs.

DeeDee's Digi of the Month Pumpkin Patch

Hi, and welcome....This post features DeeDee's October Digi of the Month. Therea few days left for you to join in the  October Digi of the Month challenge. There's lots of entries already, and for  those who haven't given the  Digi of the Month challenges a try yet, why not? It is so easy to join in, and for making and sharing just one project means you get a whole new digi set to play with for FREE! :-) .

If you participated in last month's challenge, you should have already received this set in your email. (If you participated but didn't receive the set, please contact  deedeesdigis@gmail.com -- sometimes things do go wrong with email). If you did not participate in last month's challenge, you can still purchase this set for just $1.25 this month HERE in the shop.
 So here's my entry:


- the pre-colored digi was printed and die cut with a S/B Labels 15. Used copics to shade the background sky, and add a little dimension on various portions of the digi. Ranger Distress Inks sponged on the edges to add a little color as well.

- Frantic Stamper scarecrow die cut from a snippet of white, colored with copics and pens.

- Impression Obsession bird house die - white snippet - colored with copics. WoS added to certain areas to add some sparkle.

Martha Stewart grass punch cut the grassy border from another snippet left from spraying over some white embossing swirls. Some tan dp with leafy designs was embossed with a C/Bug Oak EF, and the sentiment is part of the DeeDee's Pumpkin Patch set. Hand trimmed and edged with DI Frayed Burlap. Added some vintage buttons from my stash - these are flea market finds & gifts from friends when cleaning out behind sewing members of the family. Some of the buttons in my collection came from my Mom, and were from her Mother.

Hope you enjoy this fall card, and do be sure to check in on the DeeDee's Digi of the Month October Challenge.

Also check out the Cards by Friends tab and see some new cards that we've been blessed to receive recently. Thanks for joining me here, and hope you're all set for a wonderful week. Big hugs.

10/19/2015

Christmas Card Club - Simple Wreath

Hello & welcome. This post should have been published yesterday, but I totally forgot it was Christmas Card Club Sunday, so apologies to all my CCC Teammates! Before I share the card, let me extend a warm welcome to 2 lovely new followers:

Birgit of BB Creations  and Team Clark (Autumn) of Sew, Paper Paint
 
Thanks for joining here as followers, and I hope all my other blog buddies will give a visit to each of these nifty blogs. Birgit has some good movies reviewed, and Team Clark has some inspiring cards that I _know_ you'll want to enjoy.
 
We had a very busy week after we returned home, were out every single day at some appointment or other. However, on the plus side of all the runnin' round, we had gorgeous weather to enjoy. Over the weekend, even though the skies were blue with lovely sunshine, we did get some cooler temps.  Saturday, the sweatpants got dug out of the closet & Sunday morning, the heat was turned on for the main floor- the basement is still quite cozy with no heating as yet. Guess it's time for winter weather.
 
Here's the CAS wreath card...I was hunting for a Memory Box bramble wreath image that is hiding. So this simple stamp created a one layer card:
 
 
- Inkadinkadoo image inked with versamark, heat embossed with Ranger Christmas Green (has lots of red & green glitter bits in it).
 
- Pilot & pentel ink pens were used to color in the motif...and I think this is probably the _most_ CAS, one layer card I've ever done :-}
 
Do please check out my Christmas Card Club Teammates (listed on the right side bar) to see what CAS wreaths they shared. Thanks to Karen - for her CAS Simple Wreath Challenge, and my huge apologies for being so late in creating & posting!

Thanks for stopping by, and God Bless.

10/12/2015

Floral Thank You - Faux Mother of Pearl

Good afternoon, and hello from South Carolina, where we have lovely sunshine! We are getting sorted around from traveling all day yesterday. It was a good ride up the road, and we made good time, except for one place in Atlanta, where the traffic slowed to a standstill. However, we had left early (when the DD left for work at 5:30 am...Ugh. You know how I love to get up early). So thankful to arrive home safely last evening. Today is unpacking, sorting & paying bills, doing some laundry.

This card has been received, so sharing now on the blog.  Hope you like it.


- Faux Mother of Pearl background created by dabbing some Tsukineko Frost White Ink onto the c/stock with a wadded piece of cling wrap. Just in some areas, leaving plenty of non-dabbed spaces. Let this dry, then used some sprays in coral/orange tones, with some darker green spray over that. This muddles together, and I thought it looked quite nice. I was trying to get shades on the background that looked ok with the flower colors. The pearly white glimmer shows through so pretty.

- An older wooden stamp was inked up with Memento markers, spritzed with a fine mist of water; stamped onto white c/s (may have been watercolor paper...forget exactly what I used :-}. Embossed with several sizes of an oval die.

- Die cut the framing piece with the largest oval in the die set, and adhered the floral piece under this, placed on a white cardbase.

- Elizabeth Craft die sentiment, several layers, (yay, snippets) colored with copic markers, added a layer of WoStella for shimmer. Then added a natural twine bow that has a little gold thread running through it.

This card was for a special blogger who has been so kind and helpful to me during our friendship, and I wanted to say a heartfelt Thank you. The faux mother-of-pearl technique with the frost white ink was something I learned from her. I have such extremely talented blog friends - for whom I am so grateful - for each of you teaches me something!

Thanks for joining me today. As soon as things get caught up here (and yes, we have doctor's appointments this week too - ugh)..I will get going on some Design Team assignments. Ya'll have a great week. Hugs & Blessings. (oh yes, it's perfect porch swing weather just now too).

10/10/2015

Sad News

Good afternoon.

Just wanted to share the sad news that our sweet Brenda's Dwayne passed away at 4am this morning. I know that many of you have been concerned with Brenda over this journey she & her family had to take. This seemed the easiest way to let you know. She may or may not put an announcement on her blog, but I didn't think she would mind if I shared this with those of you who visit here and know Brenda.

She is truly one of God's Special People...and has shown more courage than anyone I know. Thanks again for all your prayers & positive thoughts for them during this struggle.

God Bless. As always, thanks for stopping to visit. Hugs

10/09/2015

Another Day in Paradise

Good evening and welcome. No cards to share, but I've practiced a bit with the Zig brush water color brushes while we've been here. Also had some retail therapy. At night, I'm watching Doc Martin & Rumpole of the Bailey, Pie in the Sky on Acorn.

I see I have a lovely new follower, Nancy, in the 'faces list', but I can't find a link to give you a big welcome shout out so that my readers can visit you. Thanks for joining as a follower, and if you'll contact me with a link, I'll post it later. Just so's ya know, I'm collecting more blog candy..!

We've had lovely weather, except for the past Sunday, when it rained on & off. The thing about South Florida, is: it rains for about 10-15 minutes, then the sun comes back out. It was nothing like what our area at home in South Carolina has faced. My brother lives down the street from us, and he wrote, that while they had lots of rain, there had been no flooding. Our house is sort of up (not really a hill, but we had to have a basement or else do a lot of grading), so normally we don't worry about flooding. Of course ....there can always be leaks. Still, we are thankful for no flood reports, & our prayers go out to our fellow South Carolinians who had such devastation.

I'd like to ask for your prayers (or your positive thoughts) for our friend Brenda (Friends Craftin' with Friends). Things are pretty tough & sad for my sweet Brenda just now, so she could use a lot of support. I had an email yesterday afternoon, and the news was so sad. I fear it won't be long now, before she loses her beloved husband. So thank you for prayers or positive energy sent her way.

Now, no cards, but thought you might enjoy seeing some pictures. Made these small size, but if you want a better look, double click and each will enlarge a bit. Here goes:

Tried to get a better pic of the doors for our family to see. It's much easier to see the design in the sunlight, but the house faces west, and I didn't want to get me in the reflection, so had to stand to the side. I cleaned off dog nose prints from the inside today, and a lot of this design is etched into each glass door. It's really quite detailed. The dogs can see passers by now, which is not a great thing.


Mr. took this beautiful sunset with his phone one evening. We've enjoyed some glorious views, and we sat outside a couple evenings, and watched 5 dolphins playing. Last evening, we had debris from cooking a chicken, so about dusk he tossed some bits into the water over the seawall (shh...this is a really a no-no). We saw fish come up to feed, so all the debris got eaten, and we got to enjoy a pretty silvery twilight show.
 
Thought for sure we'd get a storm this evening, as we watched these clouds roll over the water. We didn't though. In the other direction we could see the next picture.


No, thank goodness, no boat here! This one belongs to neighbors. The water views are lovely, but I'm happy to just be a visitor. We worry about high tides when we hear there are hurricanes about. 

 
The next few pics are of the granddogs...


Reilly trying to decide if she wants to go for a swim. She didn't.


Ogee looks very relaxed, doesn't he? These dogs have no modesty!


Dallas, on her futon in the guest room. This was at the same time as Ogee was asleep in the family room. Reilly (Dallas' sister) was on her bed at the end of the futon, just about in the same position. These 2 are usually right side-by-side. Ogee is more individual.
 
 
And then there's Chuck (real name is Charlie, but DH thinks he looks more like Chuck, so that's what we call him. And he answers to it). The dogs & I kept each other company today, as DH went over to Daytona for a car show, DD was at work. I don't handle the dogs, but Chuck doesn't manage going over the threshold too well, so I had to lift him out on the deck for a visit outside. Then he didn't want to come back in, so had to lift him again. Bless his heart, poor little fella has so many health problems. He's lucky he came here to live, where he gets lots of devoted care. These dogs are so spoiled!
 
Hope you weren't bored to death with the ramblin' on. Think we'll be heading home on Sunday. So ya'll have a great weekend, and thanks for poppin' by. God bless. 


10/04/2015

HLS October Christmas Challenge - Poinsettia

Hello and welcome to the HLS Christmas Challenge for October...this month our theme is Poinsettias.

 
Our challenge sponsor is Happy Little Stampers


The winner of this month's challenge will receive a free stamp set from HLS, so we hope you'll find time to join in with your poinsettia cards, have some fun, perhaps be a winner.
 
 
- Whispers stamp inked with Memento Rich Cocoa, colored with copics, some WoS, a white gel pen for highlights. Added some Viva décor  gold paste in several areas (not one of my best ideas as it did not burnish around on the leaves as planned.  Was able to scrape off most of it with my fingernail.)
Die cut with a S/B, edged with DI Peeled Paint around the edges, then with Tea Dye.
 
- Green textured Bazzill for the basecard, die cut the bottom edge with a S/B curved border. Viva Décor Gold paste over cut out areas.
 
- HLS Mixed Christmas Sentiments stamped with Versamark, heat embossed with Ranger's Queen's Gold. Because the cardstock is textured, the sentiment did not stamp out quite as crisply as it should have (memo to self: remember this when stamping on texture). However I had used the Misti to place the transparent stamp, so reinked with versamark, stamped it again perfectly placed. Just sayin' that a smooth cardstock yields a sharper, crisp image. Still looks quite nice.
 
- Used 2 different Martha Steward Poinsettia punches and some design papers to make the dimensional poinsettia in the corner. Still practicing my flower making LOL! Added a purchased Recollections holiday bow from the stash. Pretty easy card. On the inside there is a piece of Poinsettia design paper so that it would show in the cutout area. A cream colored S/B shape will be adhered later, to stamp the Christmas verse.
 
Do be sure to check out what my fellow HLS Christmas DT members have shared on the month's Poinsettia theme. Thanks for popping in, Big Hugs.


10/01/2015

On the Road Again...La La La La

Good evening, from sunny South Florida. We arrived safely on Tuesday evening, after a long ride south. About half of the drive was in rain, sometimes quite heavy. Had a very good driver at the helm, and of course my guardian angel always rides with us. Thank goodness, 'cause there's a lot of crazy drivers on the road.

We saw a gorgeous sunset as we had left the city of Tampa, on our journey out to the area where DD lives. Camera was packed so tried to see what I could capture with the smart phone (Learning to use it, but oh so slowly...we've been going to classes that Verizon sponsors for their customers. It is helping. Just a bit).


Of course the photos never capture the glorious blaze of color that the eyes see. At least my photos do not.

The kids had new front doors installed since we were here last. Since this is a beach resort area, lots of the houses have glass doors that are etched with seascapes. On one of our visits, we had visited the company that makes these doors. They are hand done, and some are done with an etching compound, and some are done by using a Dremel-like tool that actually etches the design into the glass (very expensive because of the labor involved). When the design was created (on whatever medium the designer used), it is placed on the glass, then the etching compound is used to transfer the drawing into the glass (less expensive, but still not cheap.) It took a few months for these to get made, and then installed by the company. The doors also have lights that change the colors of the doors at night - the dogs love it. Barked a lot at it, at first, but guess they are used to it by now.

Here's a picture of the green and purple changes. There's also a red & blue, but it's difficult to photograph at night, with the colors.


It's actually very impressive and looks great as one comes into the drive. Pretty from inside as well.

I'm doing my best to return visits, but won't be sharing any cards while we are away from home. I brought the Zig watercolor markers along to practice with them, and some clear stamps & EP. I find I do a bit better with staying inside the lines if I've embossed the image.

Hope you've had a good week so far. Here we are so close to the weekend, seems like time just goes faster & faster. Thanks for stopping in, and big hugs back your way.